Overview
This article aims to be a concise, step-by-step guide detailing how to write the questions, answers and outcomes for your quiz and build everything out in quizpipe.
Writing your quiz
Before you even start building your quiz out in quizpipe, it can be helpful to write everything out on paper, a word document, or spread sheet. The goal here is to:
- Know what questions your asking
- Know which answers you'll be giving
- Know what outcomes/results will show at the end of the quiz
- Understand which answers will return which outcomes/results
Understanding which answer will count towards which outcome can be challenging to think through, and we recommend working backwards: start with the outcomes/results of the quiz then build the questions and answers in.
Here's a simple example.
Outcomes:
- You're a dog person
- You're a cat person
- You don't like animals
Now the outcomes have been defined you can write questions and answers that will directly relate to each. For example:
Question: What is your favorite animal?
Answers:
- Dog
- Cat
- I don't like animals
Building your quizpipe quiz
With your content prepared you can now start the fun part - building it out in quizpipe.
Start by opening quizpipe.io and signing in using the "login" link at the top of the screen:

Enter your user name and password then select Login. If you're unable to login using your credentials or have forgotten your password, please select the "Forgot Your Password?" link.

Once you're logged in successfully you will see a blank dashboard that prompts you to create your first quiz. Go ahead and click either one of the "Let's build your first quiz!" or "New Quiz" buttons.

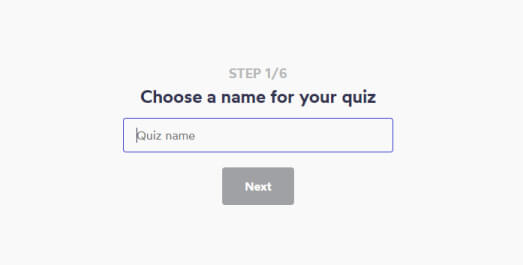
Add a quiz name
Pick a memorable name for your quiz
Pick a quiz category type
Pick the kind of quiz you want to run. There are three options; Category, Number & Percentage, or Ranking. Most of the time you will want to pick either Category or Number & Percentage.
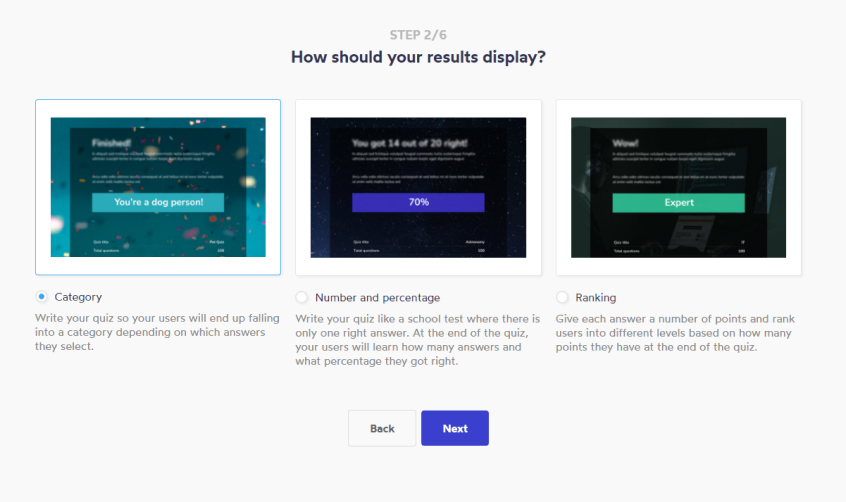
Category quizzes put your users into a category at the end. i.e. You're a dog person, or you're a cat person.
Number & percentage quizzes are the same kind of quizzes or tests you took in school. There are right and wrong answers. At the end of the quiz the user will see how many answers they got right.
The ranking quiz is more advanced. This quiz places users into grades or ranks. For example "Expert", "Intermediate" and "Novice". In this category you will need to give each answer a number of points. If an answer is correct you would assign it 10 points, if a different answer is only half correct you would assign it 5 points. At the end of the quiz the user will be given a rank depending on how many points they earned.
If you want to learn more about the different outcome types you can read these supporting articles:
For this guide we will be using the Category outcome type.
When you've selected your outcome type, press the Next button.
Add outcomes
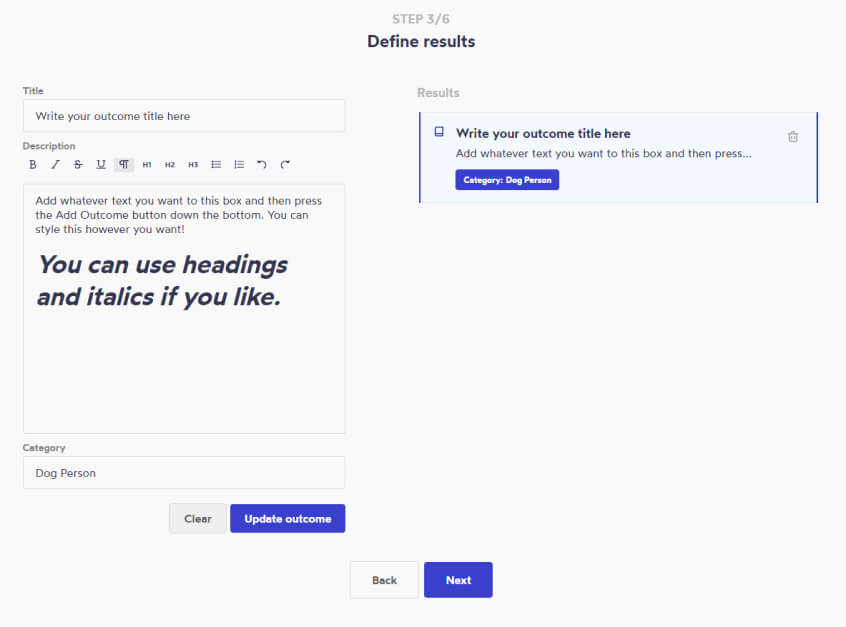
For the Category and Ranking outcome types your quiz will need to have more than one outcome. This makes sense because users taking your quiz want to be given different results at the end of the quiz.
For the Number & Percentage outcome type you will only have one result, which will show no matter how many correct answers your user gets right.
Once you've created your second outcome, hit the next button down the bottom of the screen.
Write your questions and answers
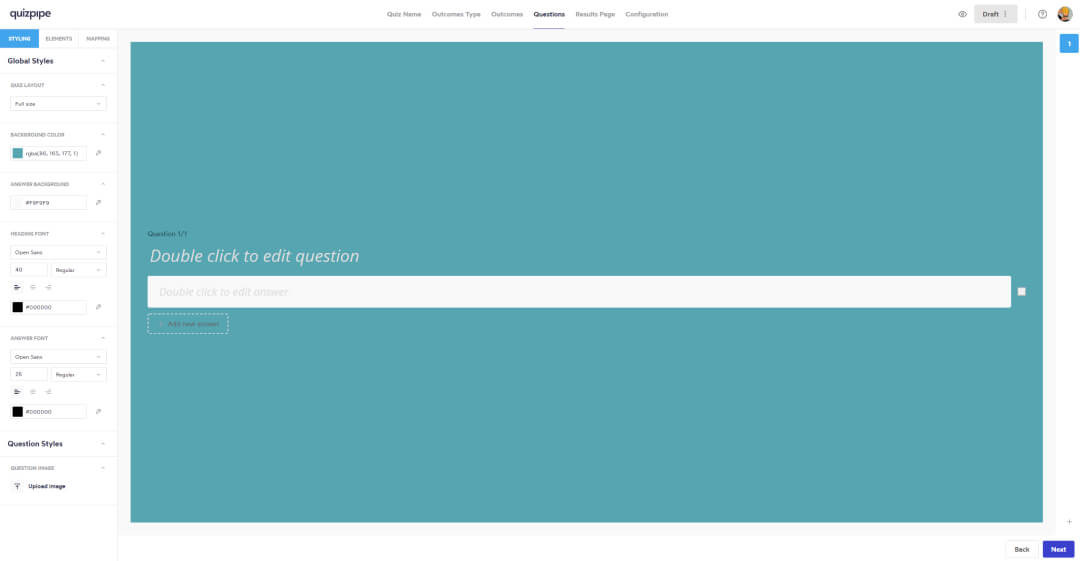
You now have the option to write your questions and answers.
To write a question simple double click on the text that says "Double click to edit question". To add an associated answer, click on the text that says "+ add new answer".
There are a range of styling options on the sidebar. More details about styling your quiz can be found in our How to style your questions and answers guide.
Once you have written your answers, you'll need to map them to the corresponding outcome. You can do this by either clicking on the tick to the right of the answer or clicking on the "MAPPING" tab in the left hand menu.

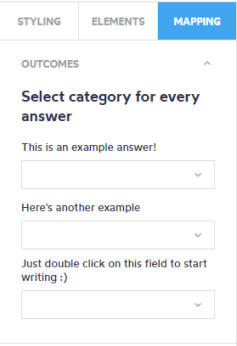
Map your answers to your outcomes
Once you've opened the answer mapping tab, pick a corresponding outcome for each answer. If you've selected the Number & Percentage outcome type, pick the correct answer. If you've selected the Ranking Outcome type, assign each answer a number of points that a user will be assigned if they pick that answer.
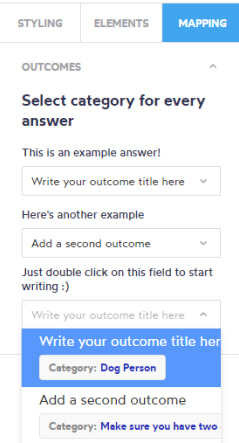
Create your next questions
When you've finished writing your first question and answers and all answers have been mapped corrected to an outcome then it's time to create your next question. To do this, simply press the + button down the bottom right hand side of the screen.
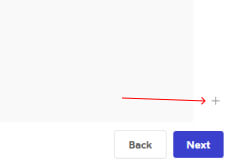
Repeat the process of adding questions and answer, and mapping answers to outcomes. Also make sure to style each question with the images and colors you want. Each question allows you to add unique styles.
Once you have added all your questions and answers, press the next button down the bottom of the screen.
Style the results page
Each result must be styled individually. To pick your first result, make sure the "Results" tab is selected, then pick an option from the dropdown.
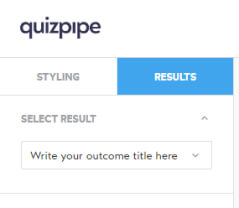
Now, select the Styling tab and change the text color, fonts, images and background colors of your answer. When you are happy with how the outcome looks, repeat the process by selecting the Results tab, selecting your next result, selecting the Styling tab and completing the styling.
Styling the results page uses the same controls and features as the questions and answers page. For a more detailed guide on how to use these features, please read our guide on How to style your questions and answers.
When you've finished styling your answers select the Next button down the bottom of the screen.
Publish & Test
Your quiz is just about done :)
If you want to use the quizpipe.io site to host your quiz, then start by updating the quiz URL field to something memorable and easy to say. If your name is unique and available a green tick will appear. If not, you will need to find a different name.

Next, fill in the social media fields. These will automatically add a description and title for the quiz if you share it on social media.
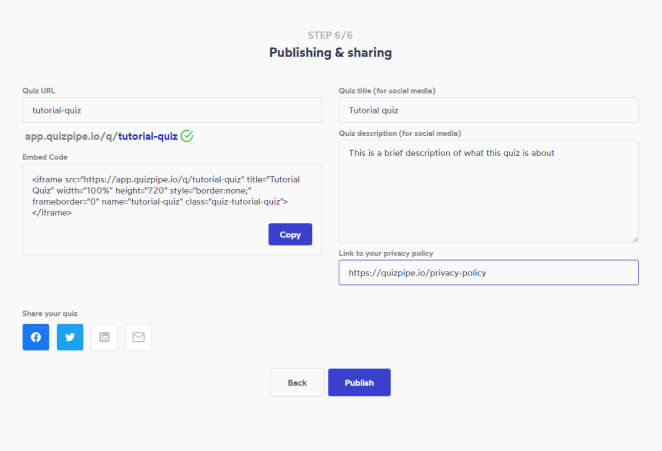
Once you're done, hit the Publish button. If everything worked you will see a confirmation message.
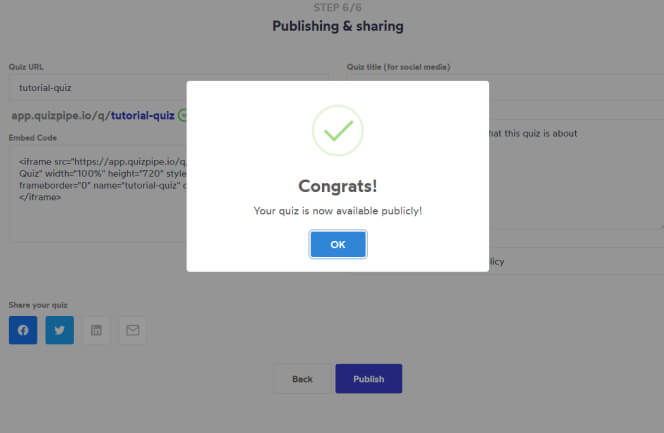
You can now copy the full quiz URL and paste it into your browser to see your quiz.
Or you can copy the embed code and add it to your website.
PLEASE NOTE: If you are signed in and trying to test your quiz to completion the app will prevent you from reaching the answers to avoid skewing your data.
Congratulations! You've published your first quiz.
View Analytics
When you want to see how many people have completed your quiz you can click on the quizpipe logo to navigate back to the dashboard. This view will give you an overview of your quiz's analytics.

To see more analytics, click the three horizontal dots to the right of the quiz name and then select Analytics.
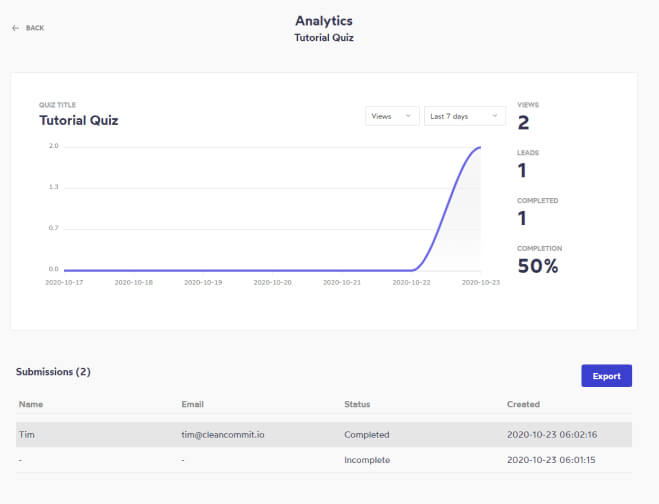
On this analytics screen you can view how many Views or Leads your quiz has achieved over a certain period of time.
Export leads
To export your leads so they can be imported into your marketing system of choice, simply click the Export button on the Analytics screen and then choose the format you would like the leads exported in.
View participant's results
To view any individual participants results, click on their name on the Analytics screen.
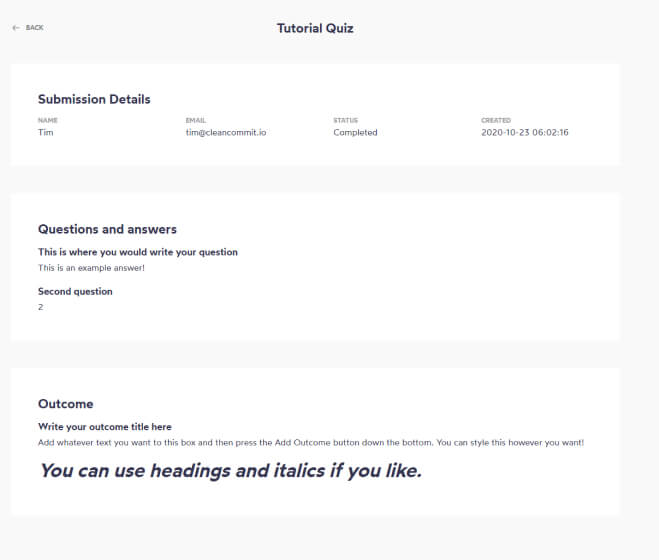
This screen will list the question and answer for each participants that completed your quiz.